Last Updated: February 25, 2026 — Reviewed by Brian Hayes, Licensed Master Plumber
Hidden leaks in your home can cause significant damage if left undetected. These leaks can lead to mould growth, structural damage, and increased water bills. Spotting these leaks early is essential to prevent extensive damage and costly repairs. Understanding the common signs of leaks and knowing how to find them can help keep your home safe and sound.
Hidden leaks are often found behind walls, under floors, or in other concealed areas, making them tricky to detect. However, paying attention to specific warning signs and using the right tools can help locate these leaks before they become a major issue. From unusual sounds to damp spots, the clues are there if we know what to look for.
In this article, we will explore how to detect hidden leaks in your home. We’ll cover common signs, the tools needed, step-by-step instructions, and preventive measures to avoid future leaks. This guide will help you become proactive in maintaining your home’s plumbing system and ensuring its longevity.
Common Signs of a Hidden Leak

Detecting hidden leaks early can save you from expensive repairs and significant damage. Here are some common signs to watch for:
1. Unexplained Increase in Water Bills: One of the first signs of a hidden leak is a sudden rise in your water bill. If your usage hasn’t changed, a leak may be the cause.
2. Damp or Wet Spots: If you notice damp patches on walls, ceilings, or floors, it could indicate a hidden leak. These spots may appear darker and feel moist to the touch.
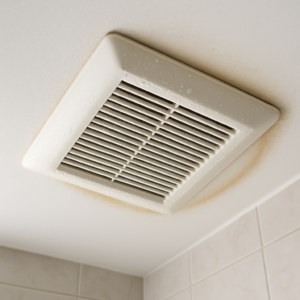
3. Mould and Mildew: Mould and mildew thrive in moist environments. If you smell a musty odour or see mouldy patches, it could be due to a hidden leak.
4. Sound of Running Water: If you hear water running when all taps are off, you might have a leak. This sound can come from behind walls or under floors.
5. Low Water Pressure: A sudden drop in water pressure can indicate a leak in your plumbing system. If a single fixture shows low pressure, it might be an isolated issue. But if the pressure is low throughout your home, a hidden leak could be the cause.
Tools and Materials Needed to Detect Leaks
Detecting hidden leaks requires some specific tools and materials. Here is a list of items that can help you find leaks effectively:
1. Flashlight: A flashlight helps illuminate dark areas where leaks might be hiding, such as under sinks and behind appliances.
2. Moisture Meter: This handy tool can detect moisture levels in walls, floors, and ceilings, helping you identify leaks without visible signs.
3. Thermal Imaging Camera: Though more expensive, a thermal imaging camera can detect temperature differences caused by moisture, revealing hidden leaks.
4. Water Meter: Checking your home’s water meter can help you determine if there is a leak. Turn off all water-using appliances and see if the meter continues to move.
5. Plumber’s Tape and Pipe Wrenches: These materials are useful for temporary fixes when you find the source of a leak until professional help arrives.
By using these tools, you can effectively detect hidden leaks in your home, preventing damage and avoiding costly repairs. The right tools enable you to spot leaks early and take action to protect your property.
Step-by-Step Guide to Finding Hidden Leaks

Finding hidden leaks in your home may seem challenging, but it’s manageable with a systematic approach. Here’s a step-by-step guide to help you detect leaks effectively:
1. Check Your Water Meter: Turn off all water-using appliances and fixtures in your home. Then, check your water meter. If it continues to move, this indicates a leak somewhere in your plumbing system.
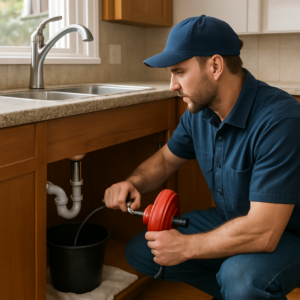
2. Inspect Visible Pipes: Look for any visible pipes in your home, including those under sinks and behind toilets. Use a flashlight to check for any drips, wet patches, or corrosion.
3. Use a Moisture Meter: Move your moisture meter along walls, floors, and ceilings. High readings indicate moisture build-up, suggesting a hidden leak.
4. Listen for Unusual Sounds: In a quiet house, listen for sounds of running or dripping water. These sounds could point you toward the location of a hidden leak.
5. Utilize Thermal Imaging: If available, use a thermal imaging camera to scan your walls and floors. Cold spots may indicate the presence of moisture from a leak.
6. Check Appliances: Inspect areas around water-using appliances such as washing machines, dishwashers, and water heaters for any signs of leakage.
By following these steps, you can systematically find hidden leaks and address them before they cause major damage.
Preventive Measures to Avoid Future Leaks
Preventing leaks is much easier and less costly than repairing damage caused by them. Implement these preventive measures to avoid future leaks in your home:
1. Regular Inspections: Make it a habit to regularly inspect your pipes, faucets, and fixtures. Look for any signs of wear, corrosion, or moisture.
2. Maintain Water Pressure: Ensure your home’s water pressure is within the recommended range. High water pressure can strain your pipes and cause leaks. Consider installing a pressure regulator if you don’t already have one.
3. Install Water Sensors: Place water sensors in areas prone to leaks, such as basements, near water heaters, and under sinks. These devices will alert you to the presence of water, allowing you to address leaks promptly.
4. Replace Worn-Out Parts: Be proactive about replacing old or worn-out plumbing fixtures and hoses. Over time, these parts can deteriorate and become susceptible to leaks.
5. Insulate Pipes: Insulating your pipes, especially in colder areas like basements and crawl spaces, can prevent them from freezing and bursting during winter months.
6. Use Quality Materials: When installing new pipes or fixtures, always use high-quality materials and ensure proper installation. This can significantly reduce the risk of leaks.
Taking these preventive steps can help you maintain a leak-free home, saving you time and money in the long run.
Conclusion
Detecting and preventing hidden leaks is essential for maintaining the health and safety of your homes. By understanding the common signs of leaks, using the right tools, and following a systematic approach, you can identify and fix leaks early. Regular maintenance and preventive measures are also key to avoiding future leaks and preserving the integrity of your plumbing systems.
If you suspect a hidden leak or need assistance with plumbing maintenance, Hayes Plumbing is here to help. With years of experience and a commitment to quality service, we are your trusted partner in ensuring your home remains leak-free. Contact Hayes Plumbing today to schedule an inspection or learn more about our leak repair services in Oshawa.
Additional Resources
Frequently Asked Questions
How do I detect a hidden leak related to hidden water leak detection?
Signs of a hidden leak include unexplained water bill increases, damp spots on walls or ceilings, musty odours, and mould growth. Hayes Plumbing uses professional detection methods to locate leaks in Oshawa homes.
How much does hidden water leak detection repair cost in Oshawa?
The cost of hidden water leak detection repair in Oshawa depends on the location and severity of the issue. Hayes Plumbing provides a clear quote after assessment so you know the cost before we begin any work.
Does home insurance cover hidden water leak detection damage in Ontario?
Most Ontario home insurance policies cover sudden water damage but not gradual damage from leaks that were ignored. Hayes Plumbing recommends regular inspections to catch issues early.
Need help with leak detection and repair? Hayes Plumbing & Bathroom Renovations serves Oshawa, Ajax, Whitby, Clarington, and Pickering. Contact us or call (905) 576-3043 for a free estimate.